Let’s explore e-textiles combining sewing and electronic skills. You will get to make a sewing project using new materials, such as conductive thread and the LilyTiny board, which is designed for sewing patterns of lights onto fabrics.

Let’s begin making a bracelet or bookmark with programmed light effects. Do you remember how to make simple circuit with copper tape, LED light and a coin cell battery? This time you will use conductive thread, sewable LED lights a preprogrammed board called the LilyTiny board

The LilyTiny is a tiny LilyPad board that can make LEDs twinkle and blink in fun patterns. It is a sewable, preprogrammed board that makes LEDs light up in fading, twinkling, blinking, and flickering patterns.
A LilyTiny board has four pins to which you can attach LEDs. Each pin has a different pattern.
— from the LilyPad site: lilypadarduino.org/?p=523

If your group does not have much previous experience with sewing, start with a short sewing activity or “sewing circle.” Show how to do a basic stitch using regular thread before you introduce the conductive thread. Conductive thread is expensive and can be a bit difficult to work with for first-timers.
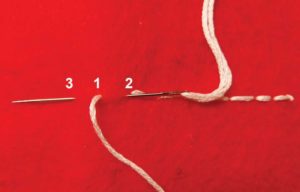
For sewing electrical connections with conductive thread, the backstitch works the best. This stitch takes time, but it makes a solid connection.
You can find many tutorials for how to do a backstitch online or in any introductory sewing book. 
Cut rectangles of felt, roughly 3×8 inches (or about 8×20 centimeters). If you want to make a bracelet, trim the length down to your wrist size with about an inch of overlap. Use snaps to create a bracelet. Otherwise, you can leave your rectangle flat if you want to make a bookmark.
As mentioned earlier, LilyTiny has four pins with different patterns programmed into each one. Pin 0 makes an LED fade in and out, pin 1 makes the LED light up in a heartbeat pattern, and pins 2 and 3 make the light steadily blink and twinkle, respectively.
Choose the LED pattern that you want to add to your bracelet/bookmark. You can have all the LEDs light up in the same style by connecting them all to one pin, or you can attach each light to a different pin for multiple light patterns.
In your drawing, mark the positions of the battery holder and the LilyTiny microcontroller. Sketch the connections between the battery negative (–) terminal and the LilyTiny negative (–) terminal. You can use different color pens to distinguish the connections to the positive and negative terminals.
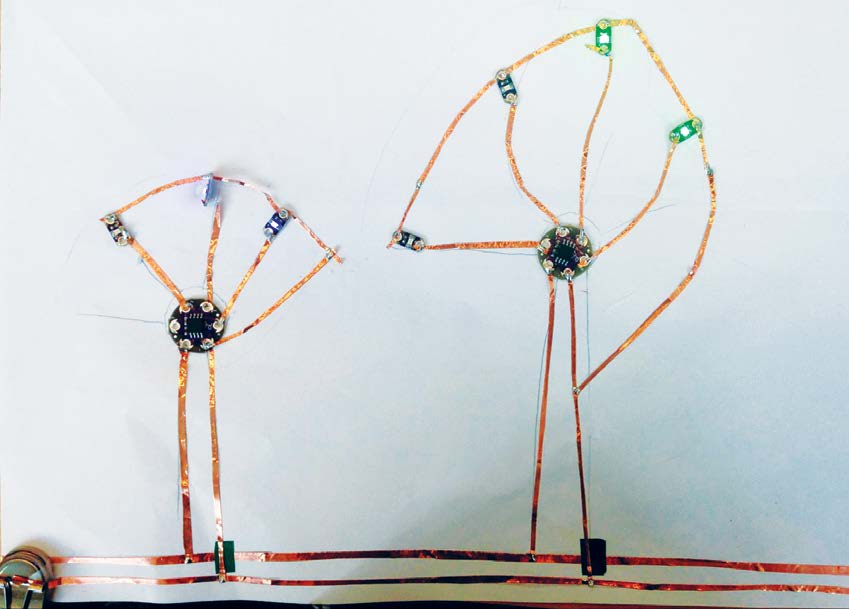
Now, draw the connections between the positive (+) sides of your LEDs and the LilyTiny pins. The following diagram shows connections from pins 1 and 2 to the LEDs.
Connect the negative (–) sides of both the LEDs to the negative (–) pin of the LilyTiny board or the negative (–) side of the battery, as shown in the figure.
Once you have marked the electrical connections on the bracelet/bookmark design, cut out your smaller elements. Then place the components on the fabric and start sewing.
To make it a little easier, you can glue the battery holder, LilyTiny board, and LEDs to the fabric before sewing with the conductive thread. Just make sure that there is no glue on the metal coating.
Stitch your circuit with the conductive thread. Attach the battery to the LilyTiny first, and then make the connections to the LEDs.

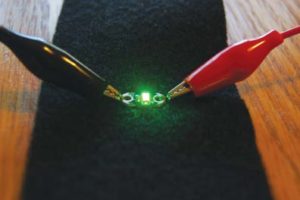
 If the circuit is all sewn together but is not working, use an alligator clip to try and test the connections. Attach one end of the clip to the battery terminal, and the other end to the LED. If it lights up, you can figure out which thread segment is causing the problem. You can sometimes even diagnose it along the whole thread line by running the metal nose of the clip along the thread until you get the LED to light.
You can encourage the makers to try using all the pins on the LilyTiny in the next iteration of their soft circuit projects.
Generating Ideas
Encourage the campers to share their ideas for projects using LilyTiny boards.
Explore these ideas
Express something personal. Make an e-textile project that shares something special about you. It could present your hobbies, things that you like,or the place where you come from.
Remix this circuit. Brainstorm ways to create a collaborative project combining two or more LilyTiny boards.
Make a 3D soft circuit. Make your own stuffed toy and add lights to your creation using conductive thread.

Encourage Material Exploration
Making a soft circuit is just like creating a paper circuit, only with conductive thread instead of copper tape. Encourage your makers to play with the conductive thread. They can try making a paper circuit by taping conductive thread instead of copper tape. They can also compare two circuits, one with copper tape and one with conductive thread, to see which one makes the LED brighter. Another way to explore this activity is for makers to connect two pieces of conductive thread by knotting them. Do they still transmit electricity? What happens to the light? Makers can use small leftover pieces of conductive thread for these explorations.
The thread and fabric can be hard to work with, since the thread gets tangled easily and the fabric doesn’t always lie flat. Also, conductive thread has a tendency to fray, so cut generous amounts of thread.
Please Note
Your safety is your own responsibility, including proper use of equipment and safety gear, and determining whether you have adequate skill and experience. Power tools, electricity, and other resources used for these projects are dangerous, unless used properly and with adequate precautions, including safety gear and adult supervision. Some illustrative photos do not depict safety precautions or equipment, in order to show the project steps more clearly. Use of the instructions and suggestions found in Maker Camp is at your own risk. Maker Media, Inc., disclaims all responsibility for any resulting damage, injury, or expense.
Share pictures and videos of your cool build! Be sure to use #makercamp
POST YOUR PROJECTS