


Maker Camp is funded in part by the Gordon and Betty Moore Foundation and the generous support of the Members of Make: Community.

30 Minutes
TO COMPLETE

WHAT WILL YOU MAKE?

WHAT WILL YOU NEED?
- 7 pennies, made in 1983 or later
- Scrap cardboard, about 6" square
- Paper towels
- Paper or plastic cup
- Vinegar
- Duct tape, 5" piece
- LED, red
- Medium- or fine-grit sandpaper
- Scissors
- Pencil
- Safety glasses
STEP 1
Gather seven pennies that were made in 1983 or later. You can tell when a penny was made by looking at the date on the front of it. Pennies made in 1983 and later have zinc in them, which is what we need for this project.
STEP 2
Put on your safety glasses and sand one side of each penny until it has a silver-looking finish. That’s the zinc! It could take a while to sand away the copper (brown finish), but the zinc is under there.
STEP 3
Place a penny on a piece of cardboard and trace around it six different times. Pour vinegar into the cup. Cut out the six cardboard circles and put them into the cup of vinegar.
Once they are completely saturated with vinegar, take the cardboard circles out and use a paper towel to wipe off the excess vinegar.
STEP 4
Now let’s build the battery. Cut a piece of duct tape about 1/2″ wide and 5″ long. Lay it flat on a surface — sticky side up. Place 1 sanded penny — zinc (silvery) side up — in the middle of the tape.
STEP 5
Place a cardboard circle on top of the penny. Place another penny — zinc side up — on top of the cardboard circle. Continue to do this until you’ve placed all pennies and cardboard circles in one stack. A penny with the zinc side facing up should be at the top of the stack.
STEP 6
Bring one end of the duct tape up along the side of the stack, wrap it across the top, and then down along the other side to where it meets the other half. Wrap the second half of duct tape in the same way over the first, affixing it across the bottom of the stack and cutting off any excess tape. The other two sides of the stack should remain open so we can attach the LED.
WHAT'S NEXT?
Tinker with light and shadow as you figure out how to construct an addition for your flashlight so you can see Spider-Man’s face in the beam of light! See our first prototype below. How might you add in fine structures to get the web-like features to show on Spider-Man’s face?
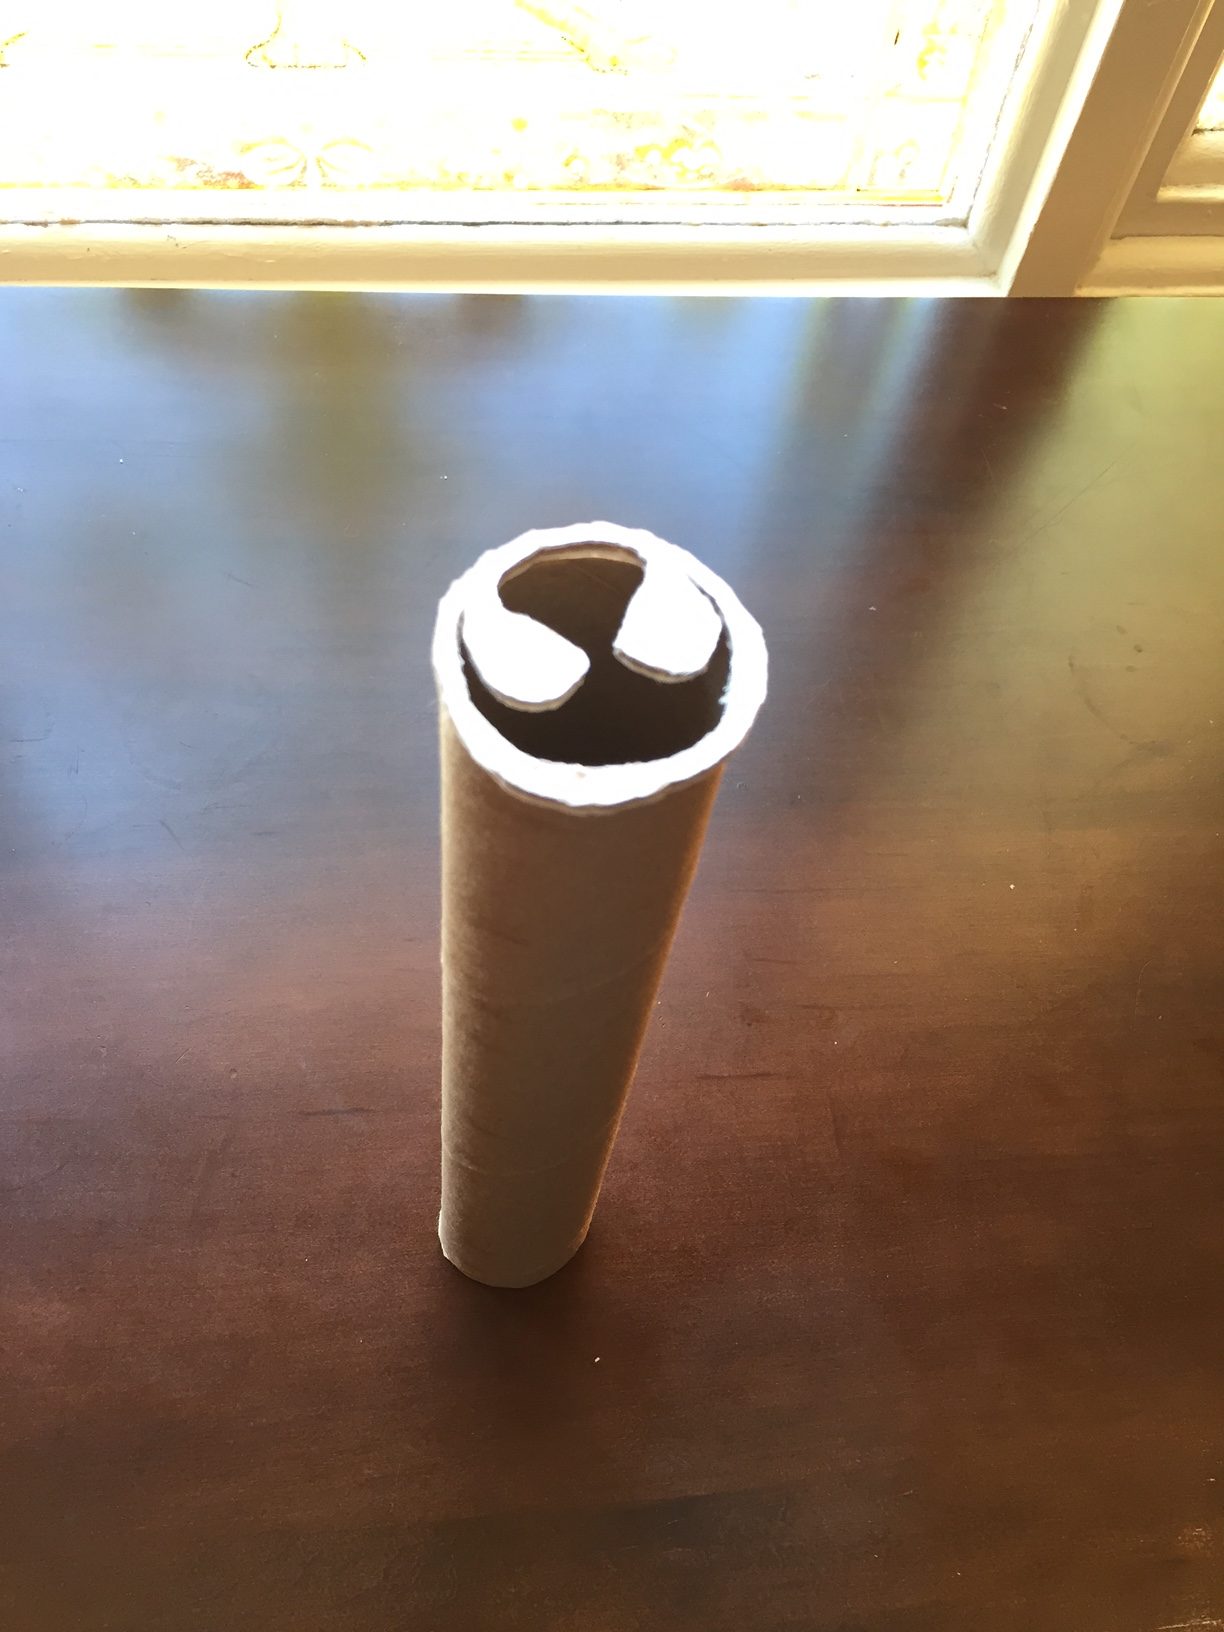
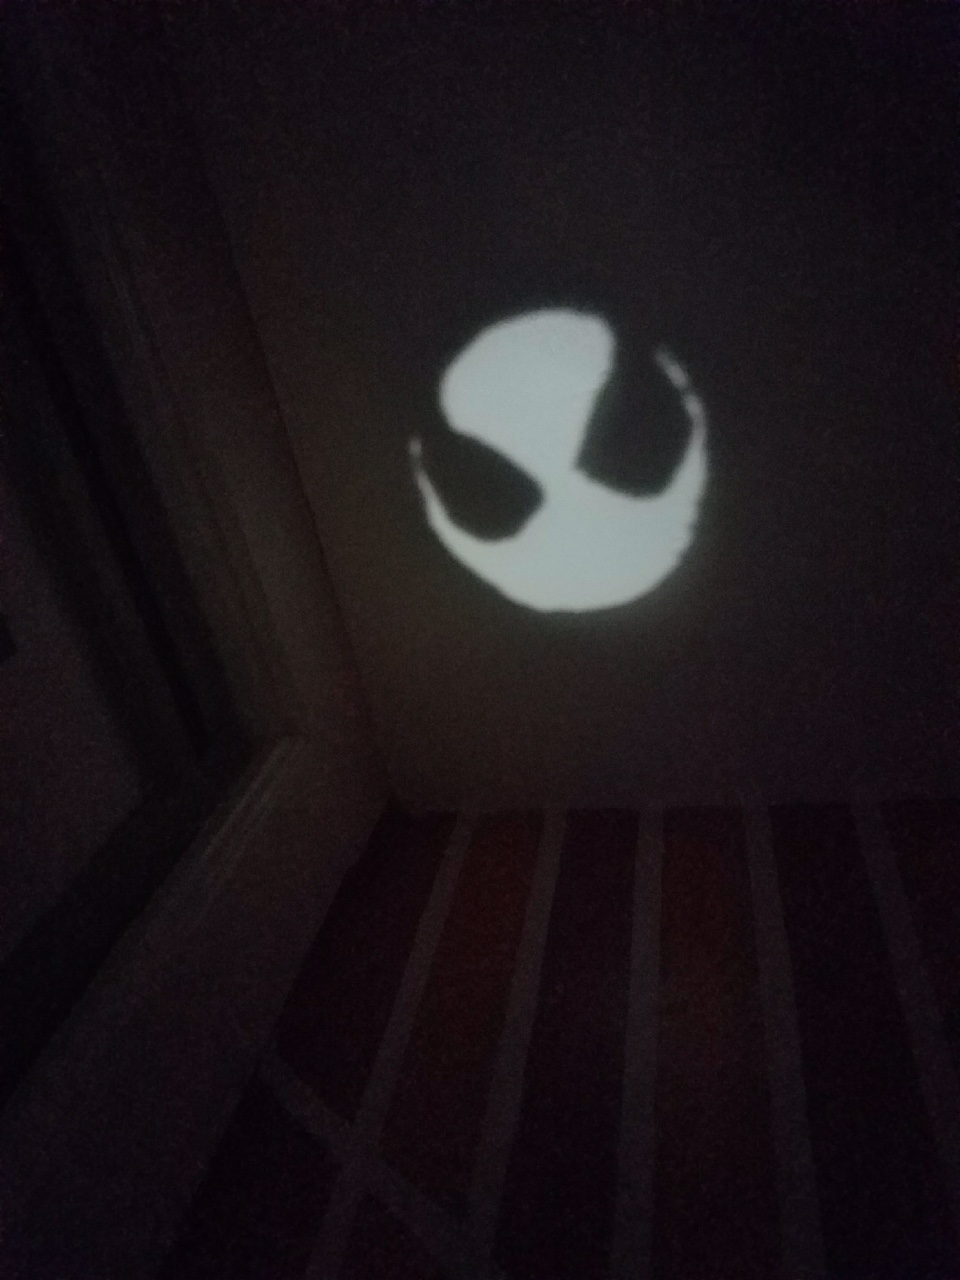
Can you make the flashlight image look more like Spidey’s face? Reference image here.
You can also increase the voltage by adding more pennies and cardboard circles to your stack. Use a multimeter to measure how much voltage your stack of pennies is creating and compare that to the label on the batteries in an inexpensive calculator. Run two wires from your penny-pack to the battery compartment of the calculator. Note where the positive and negative wires need to attach, and test how much voltage your penny battery puts out before trying to use it.

Please Note
Your safety is your own responsibility, including proper use of equipment and safety gear, and determining whether you have adequate skill and experience. Power tools, electricity, and other resources used for these projects are dangerous, unless used properly and with adequate precautions, including safety gear and adult supervision. Some illustrative photos do not depict safety precautions or equipment, in order to show the project steps more clearly. Use of the instructions and suggestions found in Maker Camp is at your own risk. Make Community, LLC, disclaims all responsibility for any resulting damage, injury, or expense.

ALL DONE? SHARE IT!
Share pictures and videos of your cool build! Be sure to use #maketogether or #makercamp
POST YOUR PROJECTSKits and Books From Maker Shed
Make: produces a variety of great products and helpful project tutorials to enhance your making experience.

