Maker Camp is funded in part by the Gordon and Betty Moore Foundation and the generous support of the Members of Make: Community.

2 days if on own, 1.5 days if you have help
TO COMPLETE

WHAT WILL YOU MAKE?

WHAT WILL YOU NEED?
- Cardboard sheets
- Ruler
- Scissors
- Pencil
- Strong Tape
- Paints
- Paintbrushes
STEP 1
Lay your triangle 1 template on cardboard. Extend side A to 12 1/4 in (31 cm) on side B to 10 3/4 in (27.3 cm). Add a third line to complete the triangle, and cut the piece out.
STEP 3
Make a 1 1/2 in (4 cm) cardboard strip and draw around it to add 1 1/2 in (4 cm) tab outlines to all three sides of the triangle.
STEP 4
Cut out around the tab outlines of the triangle. This triangle will be used for your first triangle 1 tile.
STEP 5
Use your triangle 1 template to mark a straight line across the corners of the triangle. Cut along these lines. Repeat steps 2-5 to make 30 triangle 1 tiles.
STEP 6
Now, lay the triangle 2 template on cardboard. Extend both sides to 12 1/4 in (31 cm) and join them up. Then, cut out the triangle and use it to repeat step 2.
STEP 7
Use the cardboard strip from step 3 to add tabs to the triangle, then cut off the corners. Repeat steps 6-7 to make nine triangle 2 tiles.
STEP 8
To make your square tiles, draw a square on cardboard with lines that are 12 1/4 in (31 cm) long.
STEP 9
Use the strip from step 3 to add tabs to the square. Use the triangle 1 template to mark and cut the corners. Then cut off the bottom tab. Repeat steps 8-9 to make nine square tiles.
STEP 10
Score along the tab lines of all three sets of tiles. Then fold along the score lines to finish making the tabs.
STEP 11
Arrange five triangle 1 tiles into a pentagon shape, so the tabs on the shorter sides meet. Use strong tape to fix the first two together.
STEP 12
Secure the other edges in the same way. Then repeat step 11 to make five more pentagons out of the remaining 25 triangle 1 tiles.
STEP 13
Now lay two pentagons next to each other, as shown, and a slot a triangle 2 tile in between them. Tape the tabs to connect the triangle to the pentagons.
STEP 14
Repeat step 13 to attach three more pentagons to the two you’ve already connected. Once finished, you will have a single long curving piece. This is the roof section!
STEP 15
Stand the whole piece up and pull the ends towards each other to form a circular shape. Leave a gap at the front for the top of the door, so you can easily enter the den.
STEP 16
Slot the five remaining triangle 2 tiles into the V-shaped spaces around the dome’s top edge. Line up the tabs and tape them together.
STEP 17
Place the remaining pentagon into the gap at the top of your dome. Tape the tabs together to complete the roof of the dome.
STEP 18
Now, make the wall of your dome. Start by taping the left-hand tab of one square tile to the right-hand tab of another square tile.
STEP 19
Repeat step 18 to link all nine square tiles in a line. Stand the piece up and arrange it into a circle. You have now finished the wall.
STEP 20
Now pick up your domed roof and lower it onto the wall. Make sure the tabs on both sections line up where they meet.
WHAT'S NEXT?
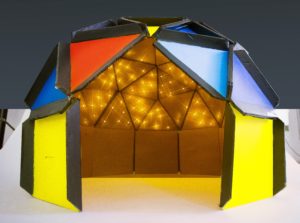
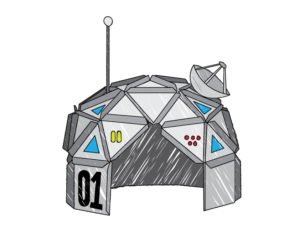
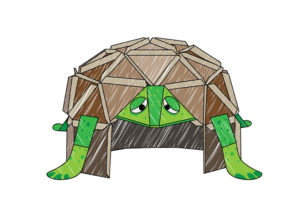
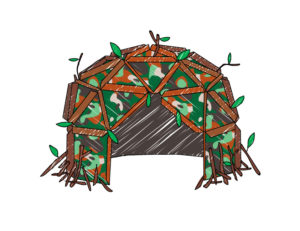
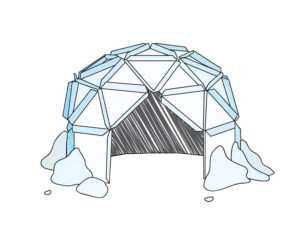
Add fairy lights to the roof of your den to make a starry ceiling, or turn your den into a space base, tortoise, woodland hideout, or igloo!
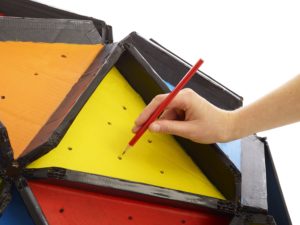
1.) Use a sharp pencil to pierce holes through all the triangular roof tiles of your dome.
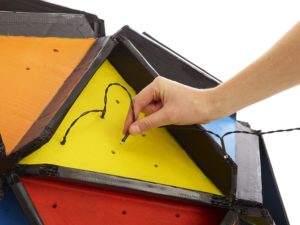
2.) Take a string of battery-powered fairy lights, and push a light through each of the holes in the roof.
3.) Turn the fairy lights on, and the roof of your dome will be filled with twinkling stars!
Space base
Paint your dome gray, then decorate the roof with futuristic designs. Add a satellite and antenna to your space base.
Tortoise
First, paint the dome brown for the shell. Then make the head and legs and tape them to the tabs.
Woodland hideout
Decorate your dome in a green and brown camouflage pattern. Add twigs and leaves for a woodland look!
Igloo
Paint the dome in icy blue and white colors. Then stick iceberg-shaped pieces of cardboard to the outside wall.
Please Note
Your safety is your own responsibility, including proper use of equipment and safety gear, and determining whether you have adequate skill and experience. Power tools, electricity, and other resources used for these projects are dangerous, unless used properly and with adequate precautions, including safety gear and adult supervision. Some illustrative photos do not depict safety precautions or equipment, in order to show the project steps more clearly. Use of the instructions and suggestions found in Maker Camp is at your own risk. Make Community, LLC, disclaims all responsibility for any resulting damage, injury, or expense.
ALL DONE? SHARE IT!
Share pictures and videos of your cool build! Be sure to use #maketogether or #makercamp
POST YOUR PROJECTSKits and Books From Maker Shed
Make: produces a variety of great products and helpful project tutorials to enhance your making experience.

