
STEP 1
To make the frame, cut out two long strips of cardboard. Wrap one horizontally around your balloon stand at mouth height. Bend the other strip over the top, angling it toward the back slightly.

STEP 2
Stick the two strips together on either side of the join, using strong tape. Repeat on the other side.

STEP 3
Now bring the ends of the horizontal strip together, at the front of the balloon stand. Overlap the edges slightly and tape them together.


STEP 4
Trim the ends off the vertical strip, so they are level with the horizontal strip. Add extra tape on the inside to strengthen the joins.


STEP 5
To fill in the hole at the back of the helmet, cut out three cardboard rectangles. Position one of your rectangles centrally and secure it with strong tape.

STEP 6
Tape the other two rectangles on either side of the piece you attached in step 5, to cover the gaps.

STEP 7
To make the visor, draw a stretched semicircle shape on a piece of cardboard and then cut the shape out.


STEP 8
Bend the visor into a curved shape and tape the ends to either side of your helmet. Tape it on the inside too, to strengthen it.


STEP 9
Use the template to draw half of the faceguard on a piece of cardboard. Flip the template to draw the other half, then cut it out.

STEP 10
Fold the faceguard in half from point to point, then bend it into a curved shape on either side of the fold.

STEP 11
With the folded edge pointing outward, attach the ends of the faceguard to either side of the helmet, using strong tape.

STEP 12
Now make the plume. Lay your helmet on its side on a piece of cardboard and use it as a guide to draw the plume. Then cut out the shape.


STEP 13
To attach the plume to the helmet, cut out two cardboard rectangles. Fold the pieces in half to create tabs, then tape them to the plume.

STEP 14
Position the plume against the back of the helmet and tape the tabs down.

STEP 15
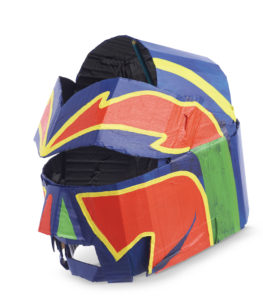
Your knight’s helmet is now ready to decorate. Use gray or silver paint to create a metal effect. Paint the plume in any color you want.
WHAT'S NEXT?
You can use the basic frame of the knight’s helmet to make other types of headgear. How about a crash helmet or a superhero’s mask? Simply repeat steps 1-6 to create the frame and then add different features.

To make a racing helmet, make a wide visor which covers more of your face. Then you are ready to race!
For a superhero’s mask, make the visor a V-shape and position it lower. Cut out a gap for your mouth and add a nose piece.

Out of the Box by Jemma Westing
Twenty-five interactive cardboard model projects that engage kids’ creativity and “out of the box” thinking skills through hands-on learning and the application of science-based principles.
Kids can bring old cardboard to life and build recycled creations they can play with, sit in, and wear.
Supporting STEAM education initiatives and the Maker Movement, Out of the Box includes 25 interactive cardboard model projects to inspire kids’ creativity through engaged and hands-on learning, and, as the founder of Maker Faire Dale Dougherty says, “to realize with their hands what they can imagine in their minds.”
From small-scale gifts to large constructions, author and award-winning paper engineer Jemma Westing uses clear, step-by-step instructions to show kids how to make dinosaurs, masks, race cars, and so much more, and inspirational images encourage them to make their own unique models when they are feeling more confident. The projects utilize only recycled materials, including cardboard rolls and boxes, so all the supplies should be easy to find right at home.
Build something brilliant with Out of the Box. The possibilities are endless!

Please Note
Your safety is your own responsibility, including proper use of equipment and safety gear, and determining whether you have adequate skill and experience. Power tools, electricity, and other resources used for these projects are dangerous, unless used properly and with adequate precautions, including safety gear and adult supervision. Some illustrative photos do not depict safety precautions or equipment, in order to show the project steps more clearly. Use of the instructions and suggestions found in Maker Camp is at your own risk. Maker Media, Inc., disclaims all responsibility for any resulting damage, injury, or expense.
Hero’s Helmet


2 Hours
TO COMPLETE
WHAT WILL YOU MAKE?
WHAT WILL YOU NEED?
- Cardboard sheets
- Strong tape
- Scissors
- Pencil
- Paints
- Paintbrushes