
STEP 1
Draw the outline of your character on a sheet of felt using the chalk pen.
STEP 2
Cut out the outline of your character.
STEP 3
If you’re making the ghost I’m demonstrating, use your scissors to cut a slit where you want the mouth located and insert the tongue so that it sticks out the front.
STEP 4
Glue the tongue to the back of the character so that it can still flap up and down in the front.

STEP 5
Using fabric glue, glue your battery holder on the back of your character. Make sure that the positive and negative sides of the holder are facing the right way.
STEP 6
Now, using an awl, poke four holes in the felt for the legs of your LEDs.

STEP 7
Using a felt pen, mark the holes for the positive and negative legs as in this illustration.
STEP 8
Place the legs of the LEDs into the holes, making sure that the long legs are in the positive holes and the short legs are in the negative holes.

STEP 9
After curling the legs of the LEDs on the back side of the character, connect the two positive legs of the LEDs with conductive thread.

STEP 10
Next, connect the conductive thread from the two positive legs to the positive side of the battery holder.
STEP 11
Connect the two negative legs of the LEDs with conductive thread.

STEP 12
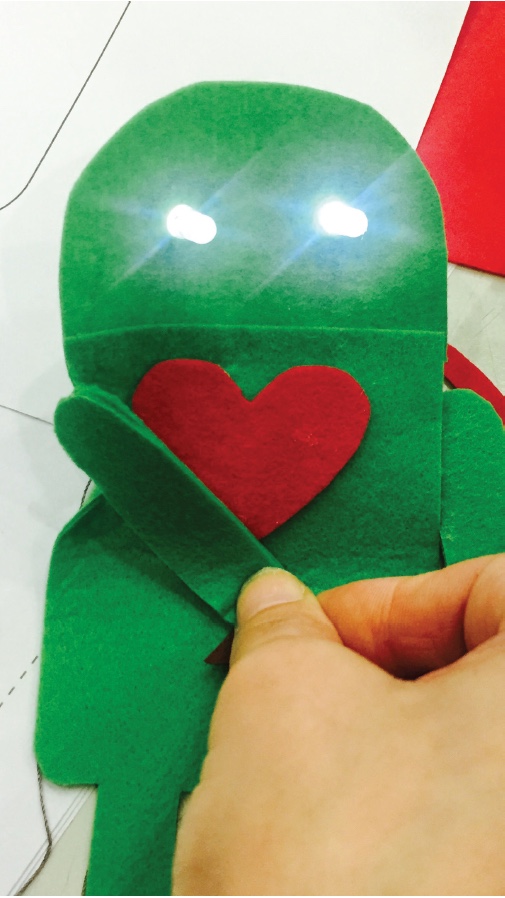
Link this connection with one side of your switch. In my example, I sewed under the mouth of the ghost.
Sew back and forth a few times underneath the ghost’s mouth. You want to make sure that there is enough conductive thread exposed for your switch to make a reliable connection.

STEP 13
Connect the negative side of the battery holder to the other side of your switch. In my example, I sewed it to the bottom of the ghost’s tongue.

STEP 14
Again, make sure to sew back and forth a few times or in a circle so that there is enough conductive thread exposed for your switch to work well. See close-up of the two sides of the switch.

STEP 15
Put your battery in the battery holder and touch the two sides of the switch together. The LEDs should light up!
WHAT'S NEXT?
By using a parallel circuit and using a switch creatively, as you did in the ghost project, you can make a wide range of characters and create some fun interactions. For instance, you can try making up a story about your character so when you touch different parts of its body, lights turn on as shown in the Whoops! Robot.
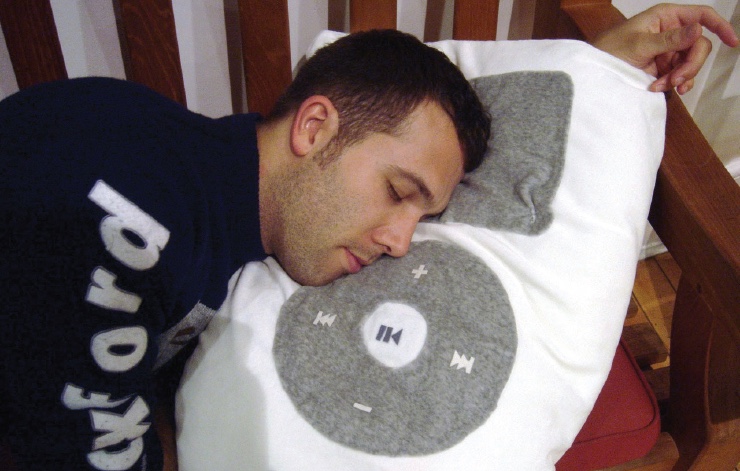
This project can even be taken to the next level by making a fully functional “Super iPod” pillow!
Please Note
Your safety is your own responsibility, including proper use of equipment and safety gear, and determining whether you have adequate skill and experience. Power tools, electricity, and other resources used for these projects are dangerous, unless used properly and with adequate precautions, including safety gear and adult supervision. Some illustrative photos do not depict safety precautions or equipment, in order to show the project steps more clearly. Use of the instructions and suggestions found in Maker Camp is at your own risk. Maker Media, Inc., disclaims all responsibility for any resulting damage, injury, or expense.
A Silly Ghost

